


Saturday, October 29, 2011
I'm back....
Hello, Everyone!!! I hope everyone is awesome and well. I've had a few projects in the works and will be showing them off in the coming weeks. I miss you all and I hope you are as excited as I am to see these transformations! Stay tuned!

Tuesday, July 12, 2011
Taking some Time off....
So I've decided to take some time off from this blog to focus on some family issues. I hope to be back soon with some new transformations, so I hope you will stick with me and be here when I come back. Thank you all for reading and I will see you soon!
Sunday, June 12, 2011
Projects I've been working on
I've been super busy lately with different projects, Here they are
-Custom making a karate belt rack
-painting a toddler bed
-Upholstering a 50's couch, literally from the 50's or 60's (they used a lot of burlap)
I have one picture of the karate belt rack.It's a little blurry from my phone and it has glass, so you have the glare from that.

Here is the couch that I'm working on, I'm just waiting to get the fabric! Can't wait to see how it turns out!!!

toddler bed picture will come soon!!!
Thursday, June 2, 2011
My One Year mark as a blogger!
Last June, I decided to start this blog so I could show my furniture transformations and thoughts I had about design. I feel in the last year that I've come so far. I've has some great ups and downs. I'm glad to my readers and for the wonderful comments you have made about different pieces. I've enjoyed this ride and I hope to make this next year as a furniture blogger a great one. Check out some of my before and afters and let me know which ones are your favorite!!!!
Thanks!!!!
Thanks!!!!
Tuesday, May 31, 2011


Friday, May 27, 2011
Piano Before and After
A friend of mine has wanted to paint their piano for a while. Now that she is going to be gone for two years it's a perfect time to do it. (she will has a wonderful piano waiting for her when she comes back) :)
She picked out this awesome color that goes on like butter and with a paint sprayer in hand I was ready to have at it!!! I love these results!


She picked out this awesome color that goes on like butter and with a paint sprayer in hand I was ready to have at it!!! I love these results!

Before

After
Since she will be leaving soon it's was much easier to take a picture
in the garage then lugging it back into the house.
Monday, May 23, 2011
Shabby Apple giveaway
Three Men and a lady is giving away a beautiful dress from Shaddy Apple. Head over there right now for your chance to win!!!
Thanks!!!
Giveaway
Thanks!!!
Giveaway
Friday, May 13, 2011
Big Reveal.... Dining Table and Chairs
Here is the before again


Here is the After


The leaf comes out from the sides instead of adding them in the middle

This is what it looks like with just four chairs

The chair after
I loved this transformation from start to finish.
The great thing about this set is... it's for Sale
Please email me if you would like to purchase : Update Sold Three weeks later!!!!
thanks!


Tuesday, May 10, 2011
Vintage Style Rocking Chair
I love this transformation!!! A friend of mine had this rocking chair and wanted a change. So here is the before and after!!

I'm linking to the following


I'm linking to the following
Saturday, May 7, 2011
New Blog
Hey, I know it's been a while. I've been working hard on a few projects and should have one up in the next few days.
I want to let you gals know about a new blog I started for my furniture portfolio. I've also changed my business name to A upholstery and Design. Please check it out and let me know what you think
http://aupholsteryanddesign.blogspot.com/
Thanks
I want to let you gals know about a new blog I started for my furniture portfolio. I've also changed my business name to A upholstery and Design. Please check it out and let me know what you think
http://aupholsteryanddesign.blogspot.com/
Thanks
Saturday, April 16, 2011
sneek preview... revamped table and chairs
Hope everyone is having a wonderful weekend! I recently acquired this table and chairs from a good friends who's parent was moving and wanted to give it away! I love this set and I can't wait to see how it turns out. Here's the before


Here are some examples of things that I'm thinking of doing to the table

From twice lovely

Table from pottery barn
Can't wait to see the final result, so stay turned!!!
Friday, April 15, 2011
Here's your sign...fun kids project
Good morning!
I've been working on a few projects and hope to show them in the coming weeks. :)
I wanted to do this project for my kids, something that was fun and they could get dirty (just a little bit). I also had some left over board from another project so I didn't have to spend anything.


I've been working on a few projects and hope to show them in the coming weeks. :)
I wanted to do this project for my kids, something that was fun and they could get dirty (just a little bit). I also had some left over board from another project so I didn't have to spend anything.

I cut the board to the desired measurment

primed and painted

Then had my kids put their hand prints and I
wrote down some things like what they like, etc.
My kids loved this project and I'm glad I got to do it with them!
Tuesday, March 29, 2011
Fabric Picture Frames
From previous post. To finish my wall I decided to use some left over fabric from my pillows that I just made.
I bought some 8 x 10 frames at a thrift store for $4, painted them and then attached the fabric on the frame backing, distressed and finished. Here is the final result!
Paint used valspar (color similar to ocean sea breeze from krylon)
Side Note: for some reason the color wasn't showing quite well. I'm still working on getting more light in my apartment. :)
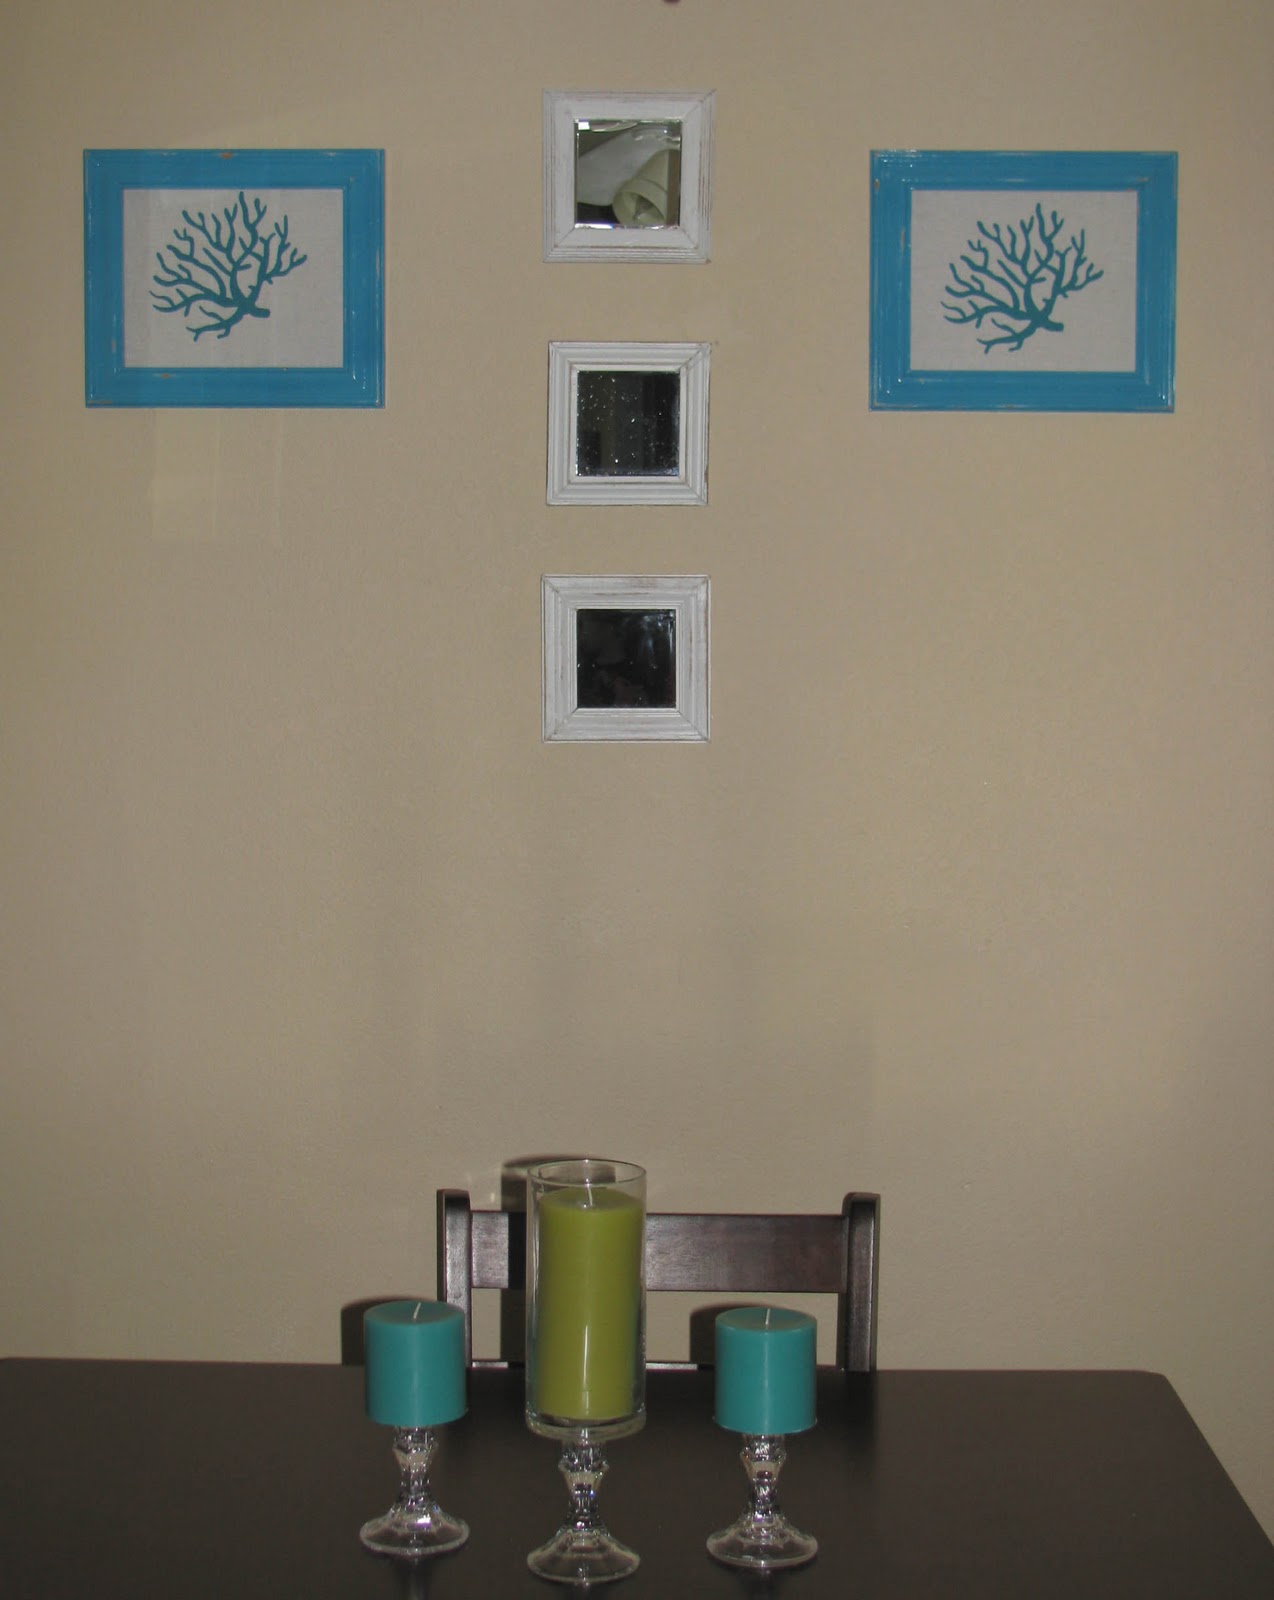


My Dining room wall.... DIY Framed mirrors
My apartment has been a work in progress. Before I moved I bought some mirrors at the dollar store and wasn't sure what I wanted to do with them until I saw this at Pottery barn

So instead of paying $150 I decided I would make them. Here's how I did it:
First I purchased some frames at a local thrift store for about $10.

Then I got my table saw, ( I would love to get and electric saw, I just don't have a place for it right now) and measured my mirror. the mirror was 5"x 5". Here is what it looked like before I assembled

Then I used Gorilla glue to put back together, primed and painted (don't mind the bigger frames, that will be for another project)

Then I added the mirrors, I used gorilla glue for that as well. Then I distressed the frames to what I wanted and here is the finished result!


Total cost:
I'm linking to the following


So instead of paying $150 I decided I would make them. Here's how I did it:
First I purchased some frames at a local thrift store for about $10.

Then I got my table saw, ( I would love to get and electric saw, I just don't have a place for it right now) and measured my mirror. the mirror was 5"x 5". Here is what it looked like before I assembled

Then I used Gorilla glue to put back together, primed and painted (don't mind the bigger frames, that will be for another project)

Then I added the mirrors, I used gorilla glue for that as well. Then I distressed the frames to what I wanted and here is the finished result!


$3 mirrors
$10 frames
$6 paint
Total cost:
$19
Can't beat that price!
Stay tuned for the finished wall!
I'm linking to the following
Sunday, March 27, 2011
Love to redo a Kitchen, but don't know what style you like?
When I was in school and learning about kitchen design I found this site to be helpful. Kitchens.com
This site will give you photos of different types of kitchens and what others have done. I just want to explain and show some picture of kitchens I like.
Traditional Style Kitchens:
Traditional kitchens have an elegant, formal characteristics of kitchens in Europe during the 18-20th centuries. Looks include elaborate crown molding and trim, dark tone woods, stone counter tops, raised panel cabinet doors.
Here are some of my favorite pictures under traditional

Great Northern Kitchen and Bath
www.gnkitchen.com

Jennifer Gilmer Kitchen and Bath
Contemporary Style Kitchen:
Contemporary kitchens are modern, minimalistic, and geometric. Characteristics include clean lines, cabinet and flooring are made of natural materials, chrome or stainless steel appliances, sometimes glass upper cabinets, warm color tones.
Here are some of my favorites

Viking Kitchen Cabinets
www.vikingkitchens.com
www.vikingkitchens.com

Drury Design Kitchen and Bath
www.drurydesigns.com

Northbay Kitchen & Bath, CA
There are more styles you can choose from but these are just two
of my favorite kitchen styles.
If you have questions or would like me
to do another segment about kitchens,
just email me! :)
Subscribe to:
Posts (Atom)